Extensions
Set Up Kintone Integration with Formstack Documents
Kintone
Take the data that you’re organizing in Kintone and populate various documents like contracts, invoices, agreements and more.
Back to Extensions page
With Formstack Documents you can automatically take the data that you’re organizing in Kintone and populate various documents like contracts, invoices, agreements and more. In this example, we will go through how to automatically generate an invoice from data in Kintone and email it to your customer.
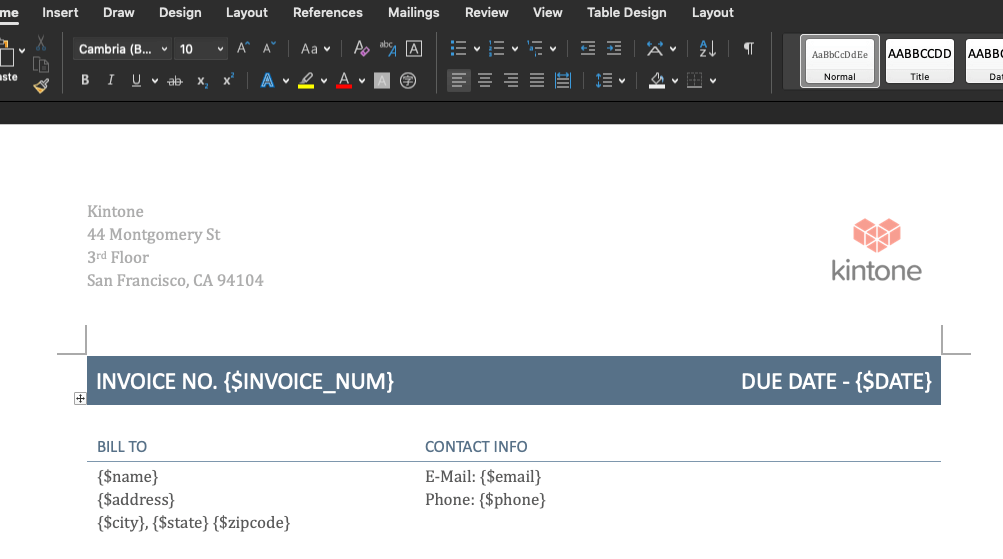
To get started, setup your invoice template using a Word document. Inside the Word document, add your normal quote information, then for the spots that you want to insert data from Kintone, use merge fields that look like: {$name}, {$address}, etc. Reference the Formstack Documents help doc for more information in creating a template.
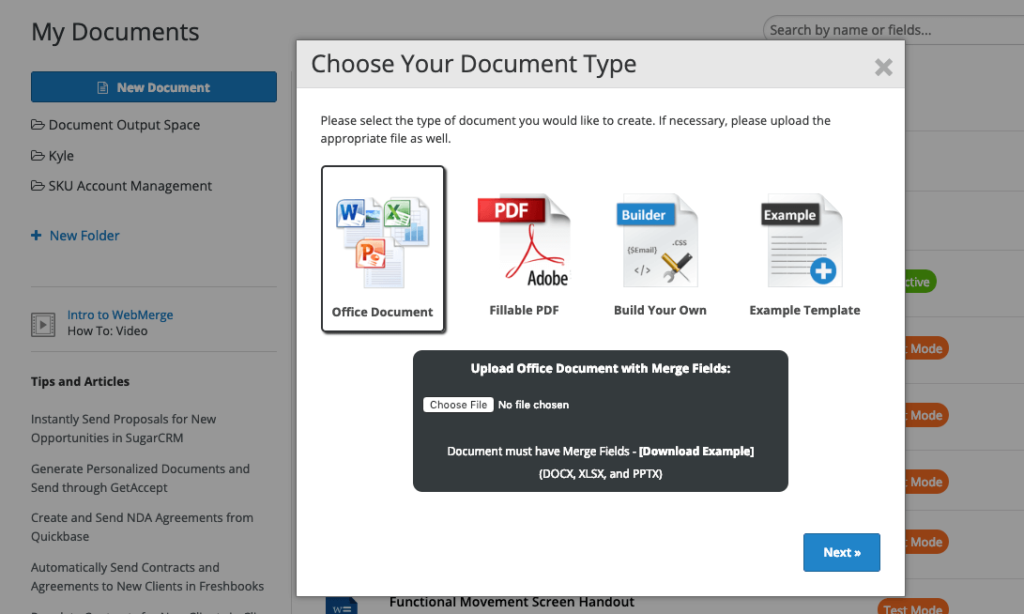
Login to your Formstack Documents account. From the Documents page in Formstack Documents, click the New Document button and enter a name. On the next step, pick Office Document as the document type and then select the file from your computer.
Define your preferred delivery options. Reference the Formstack Documents help doc for more information.
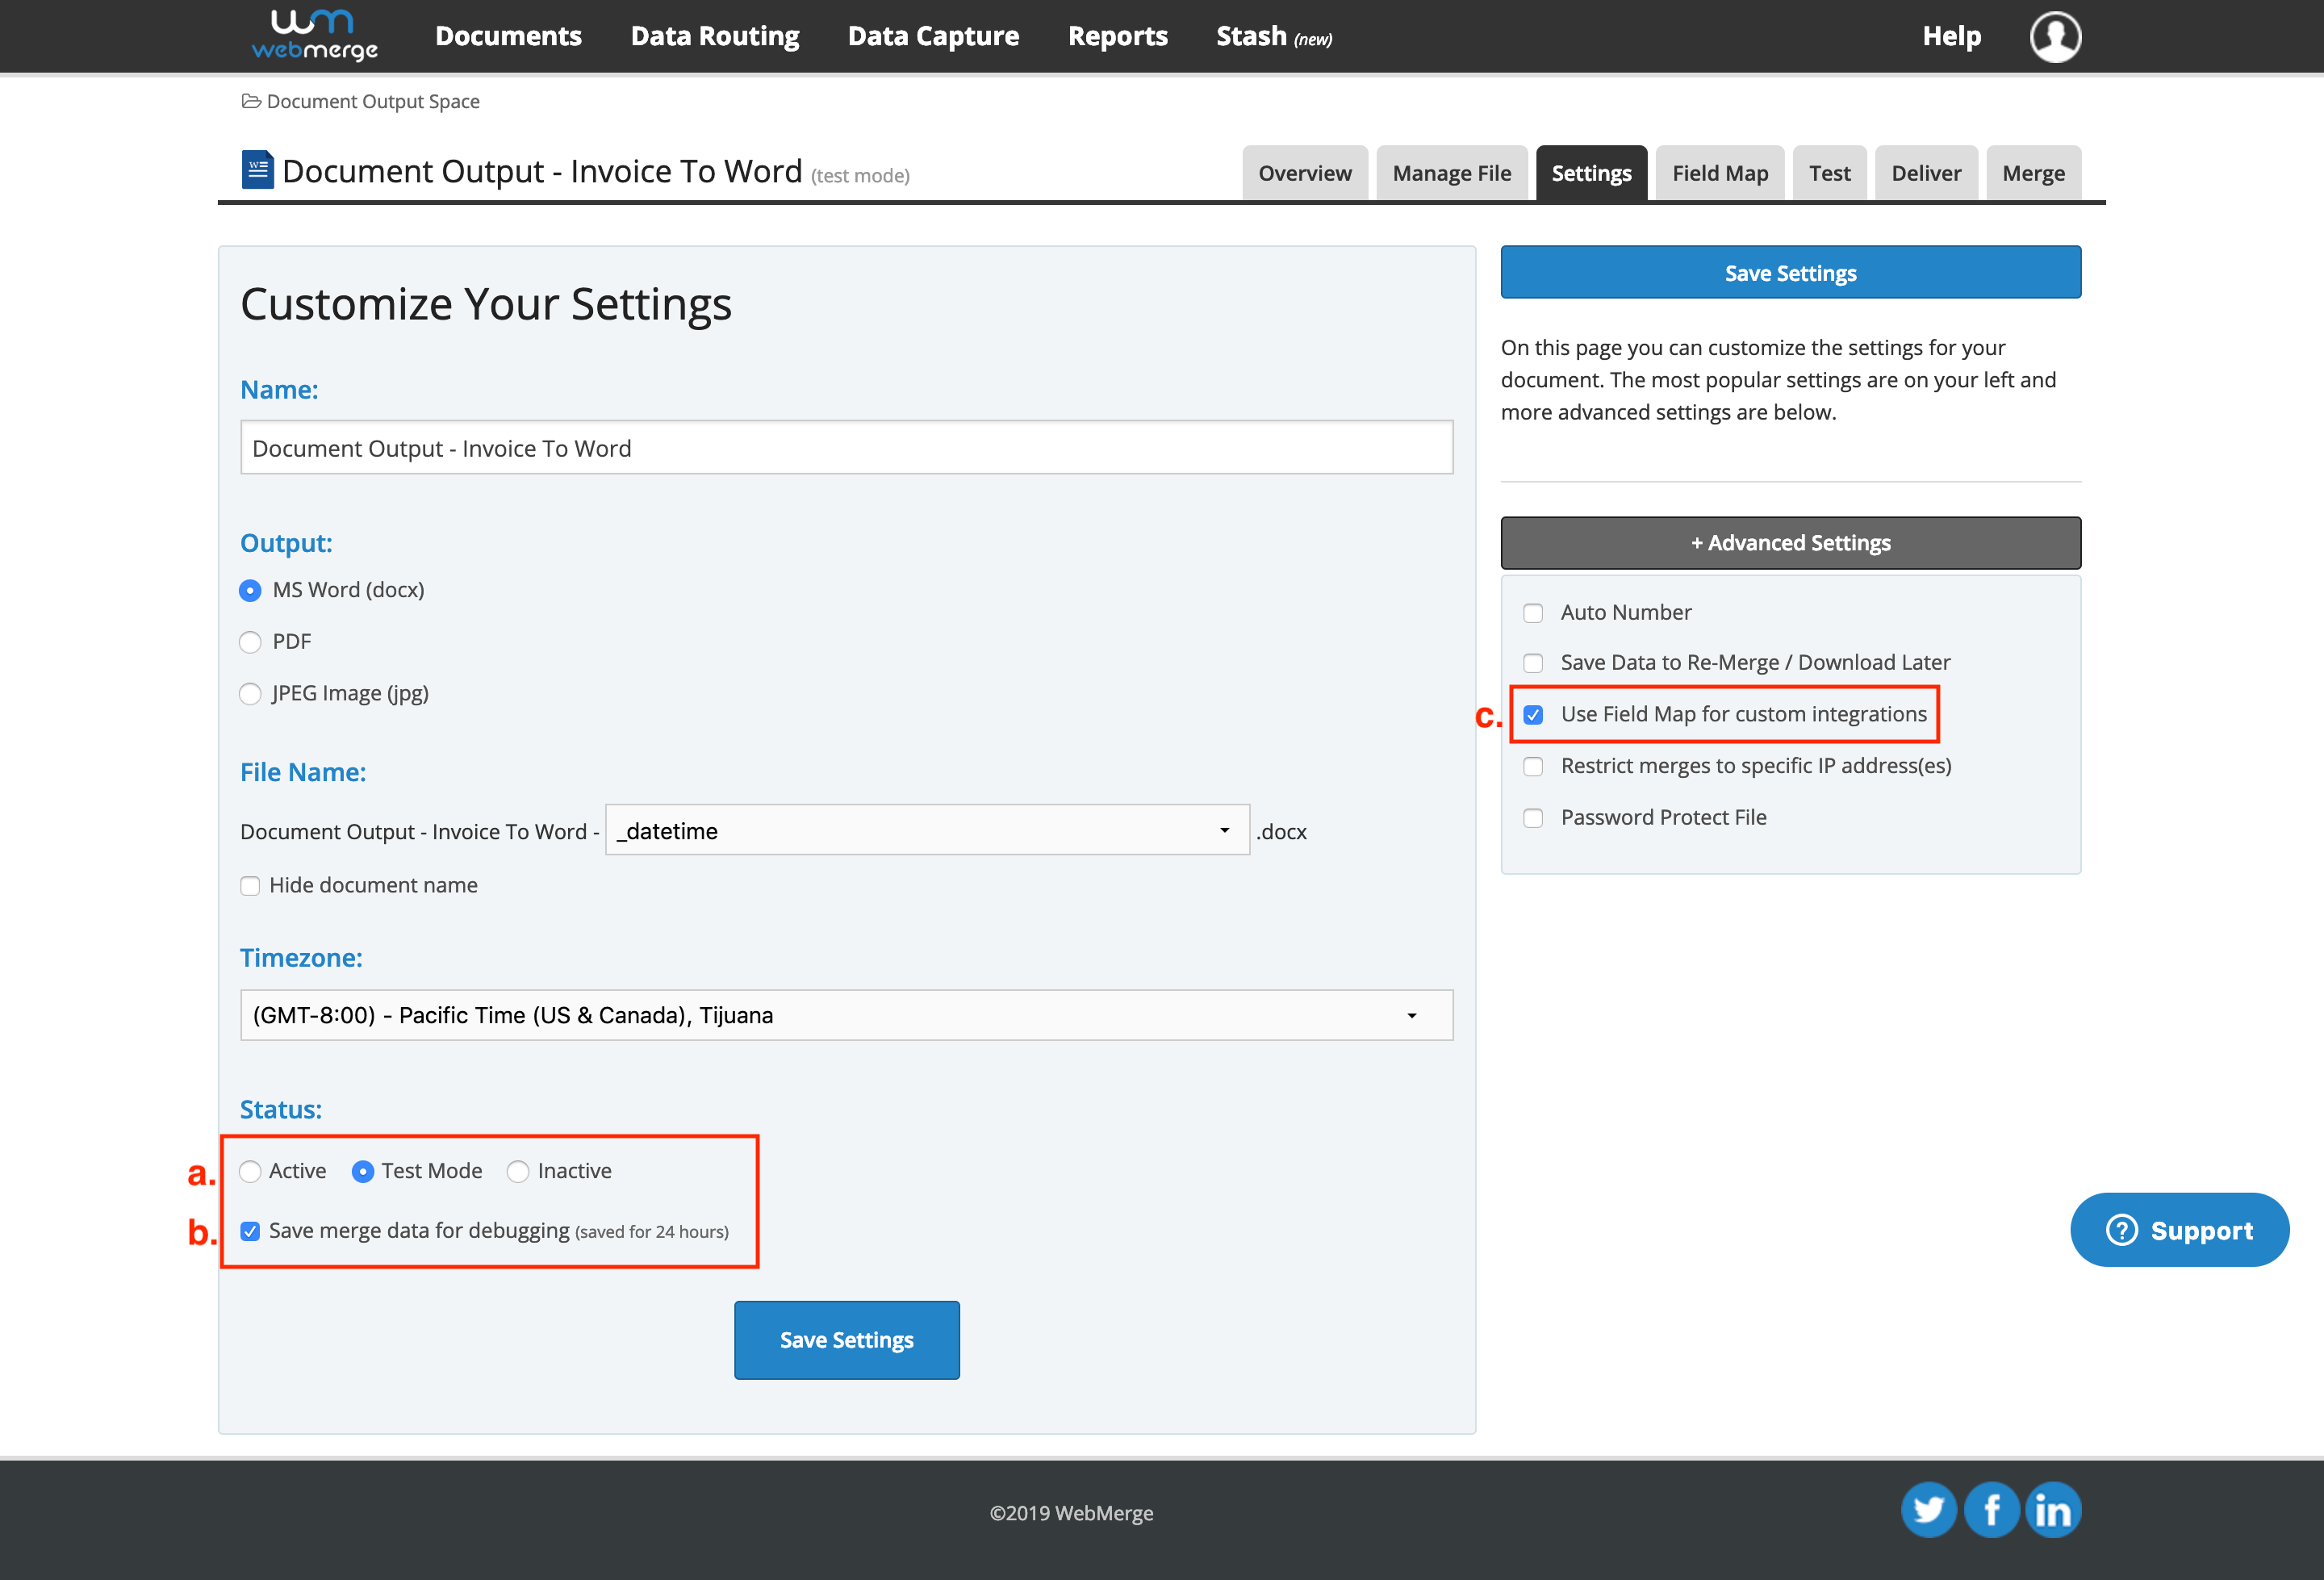
After you upload your template, you’re going to be taken to the Settings tab where you can modify various options like the type of file that you want to generate and the name of the file. For this example, let’s generate a Word document and include the date and time in the file name.
We’re also going to turn on the Field Map and Debug Mode so that you can see the data that’s coming over from Kintone and match those fields with the merge fields.
Set the status:
Set the advanced settings:
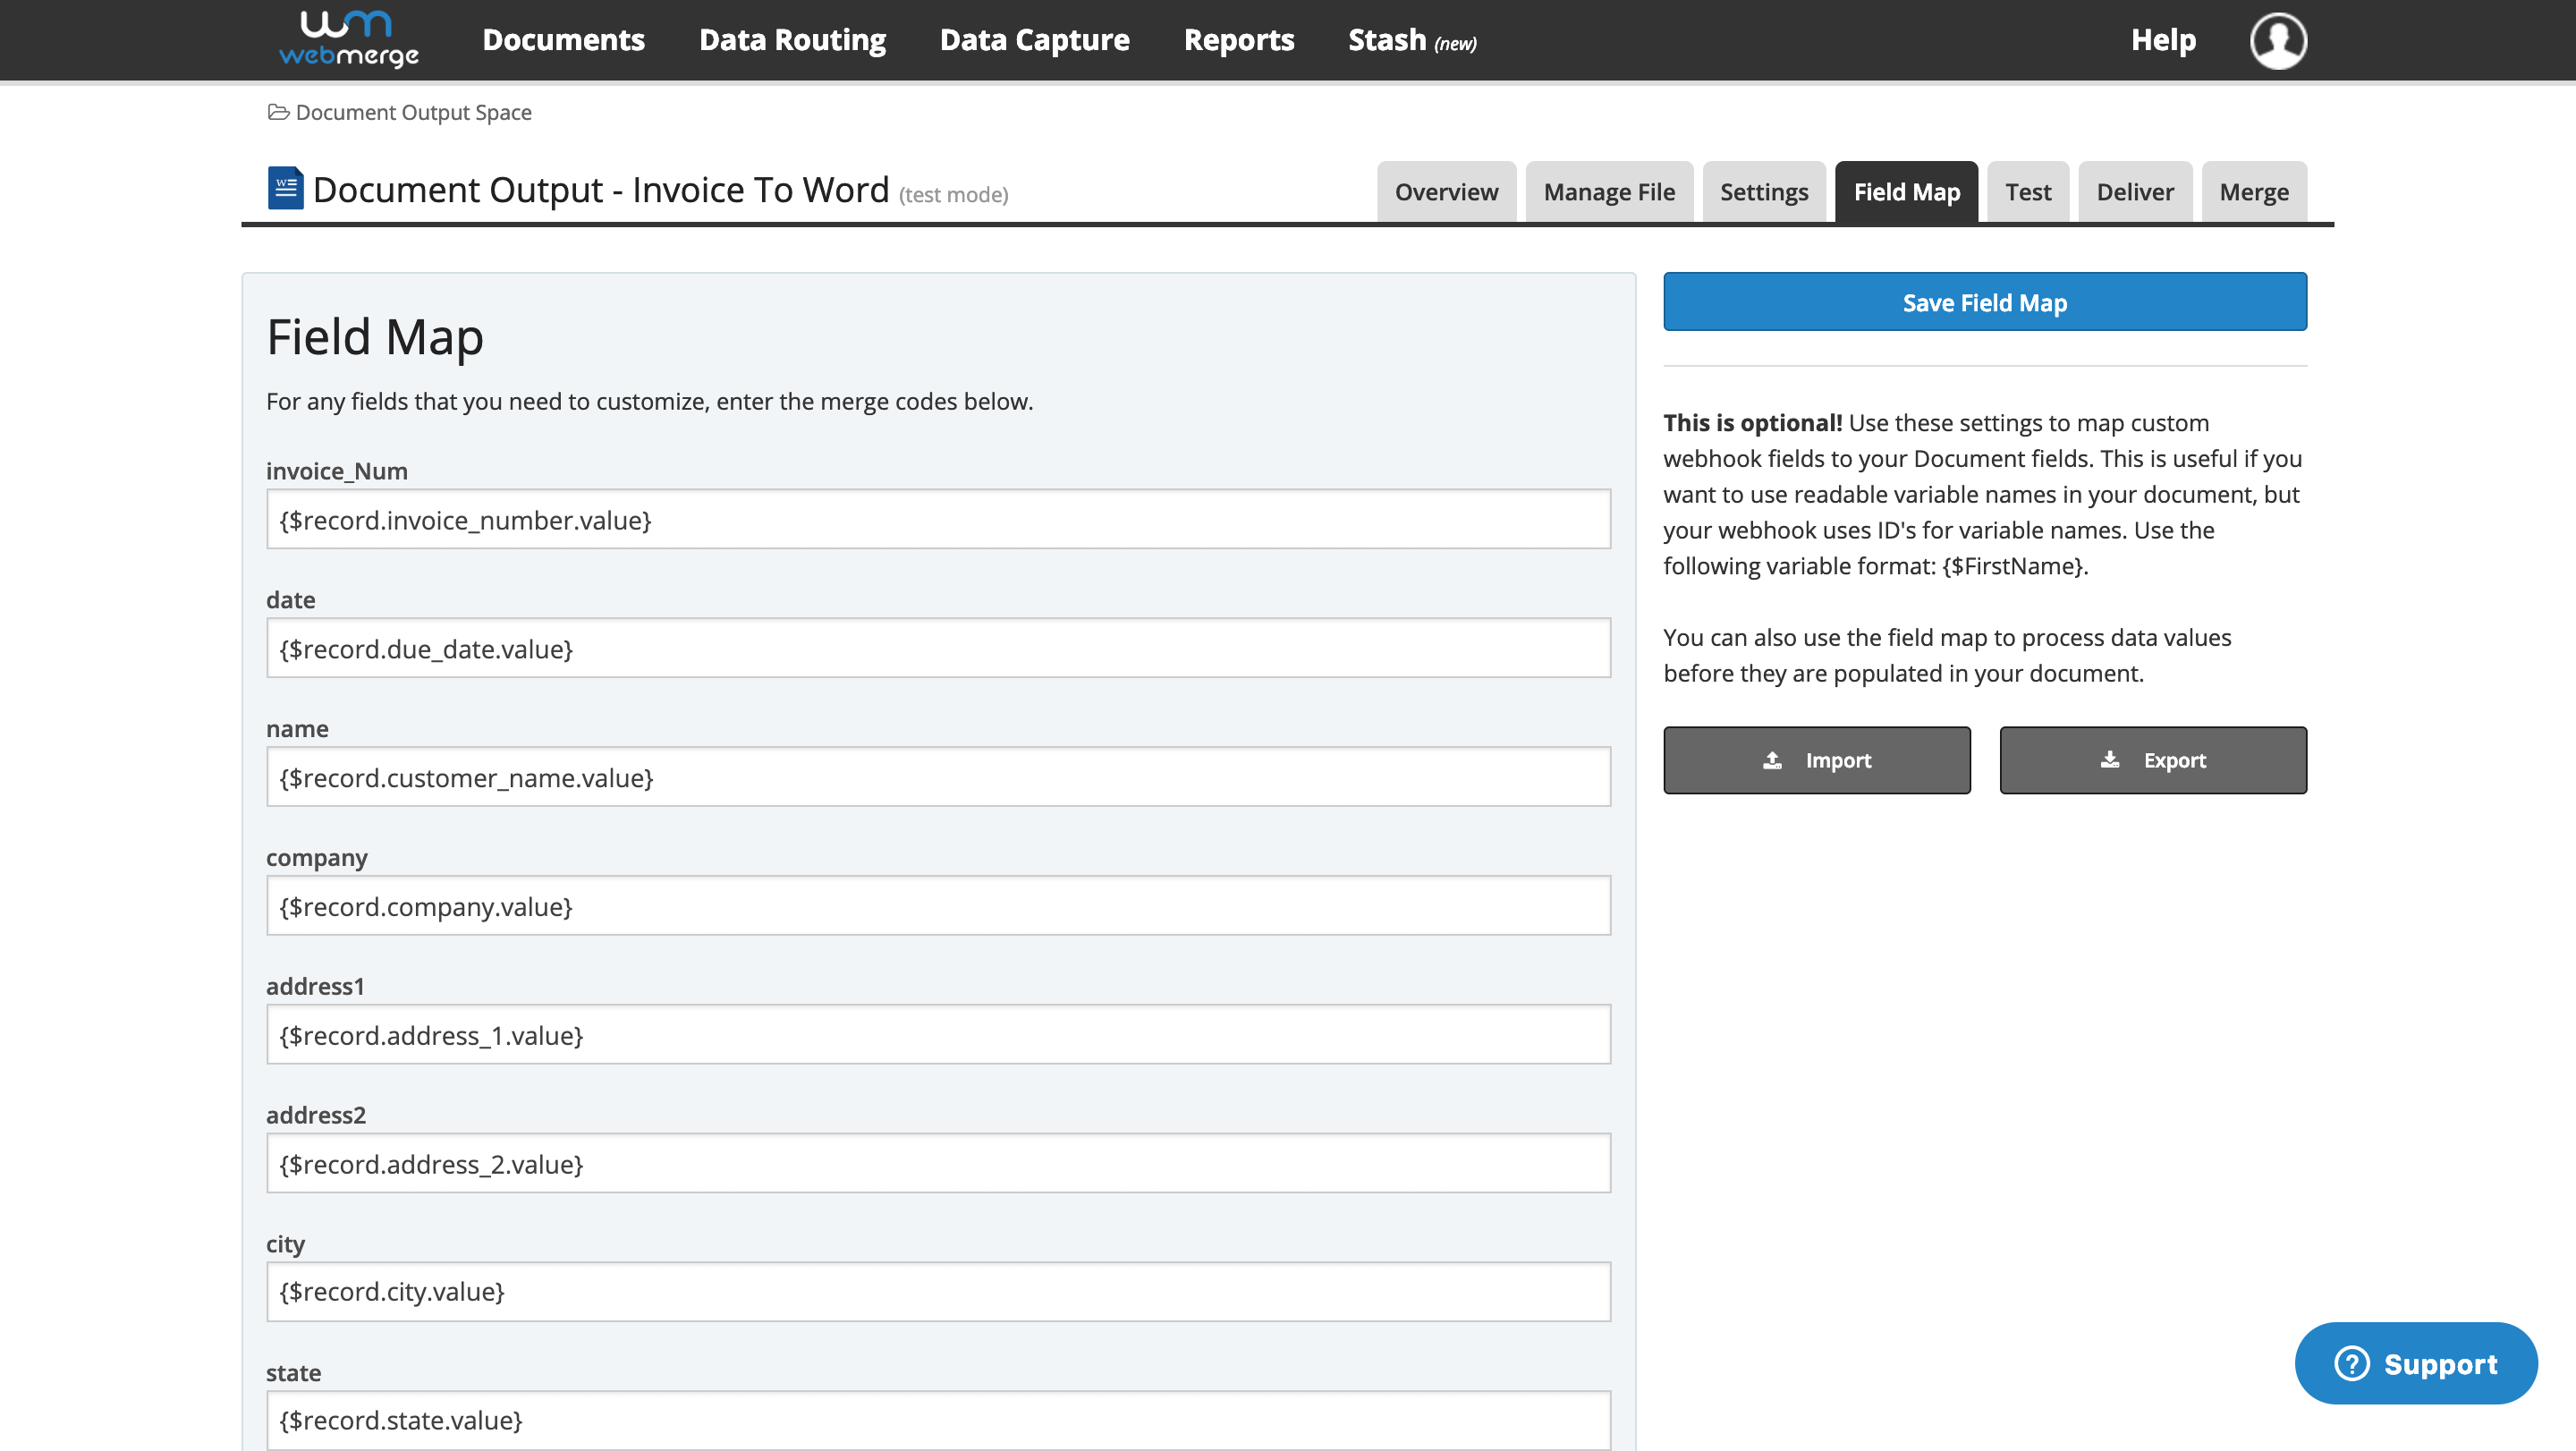
Open up the Field Map tab and for each merge field, enter the associated field code of the Kintone field.
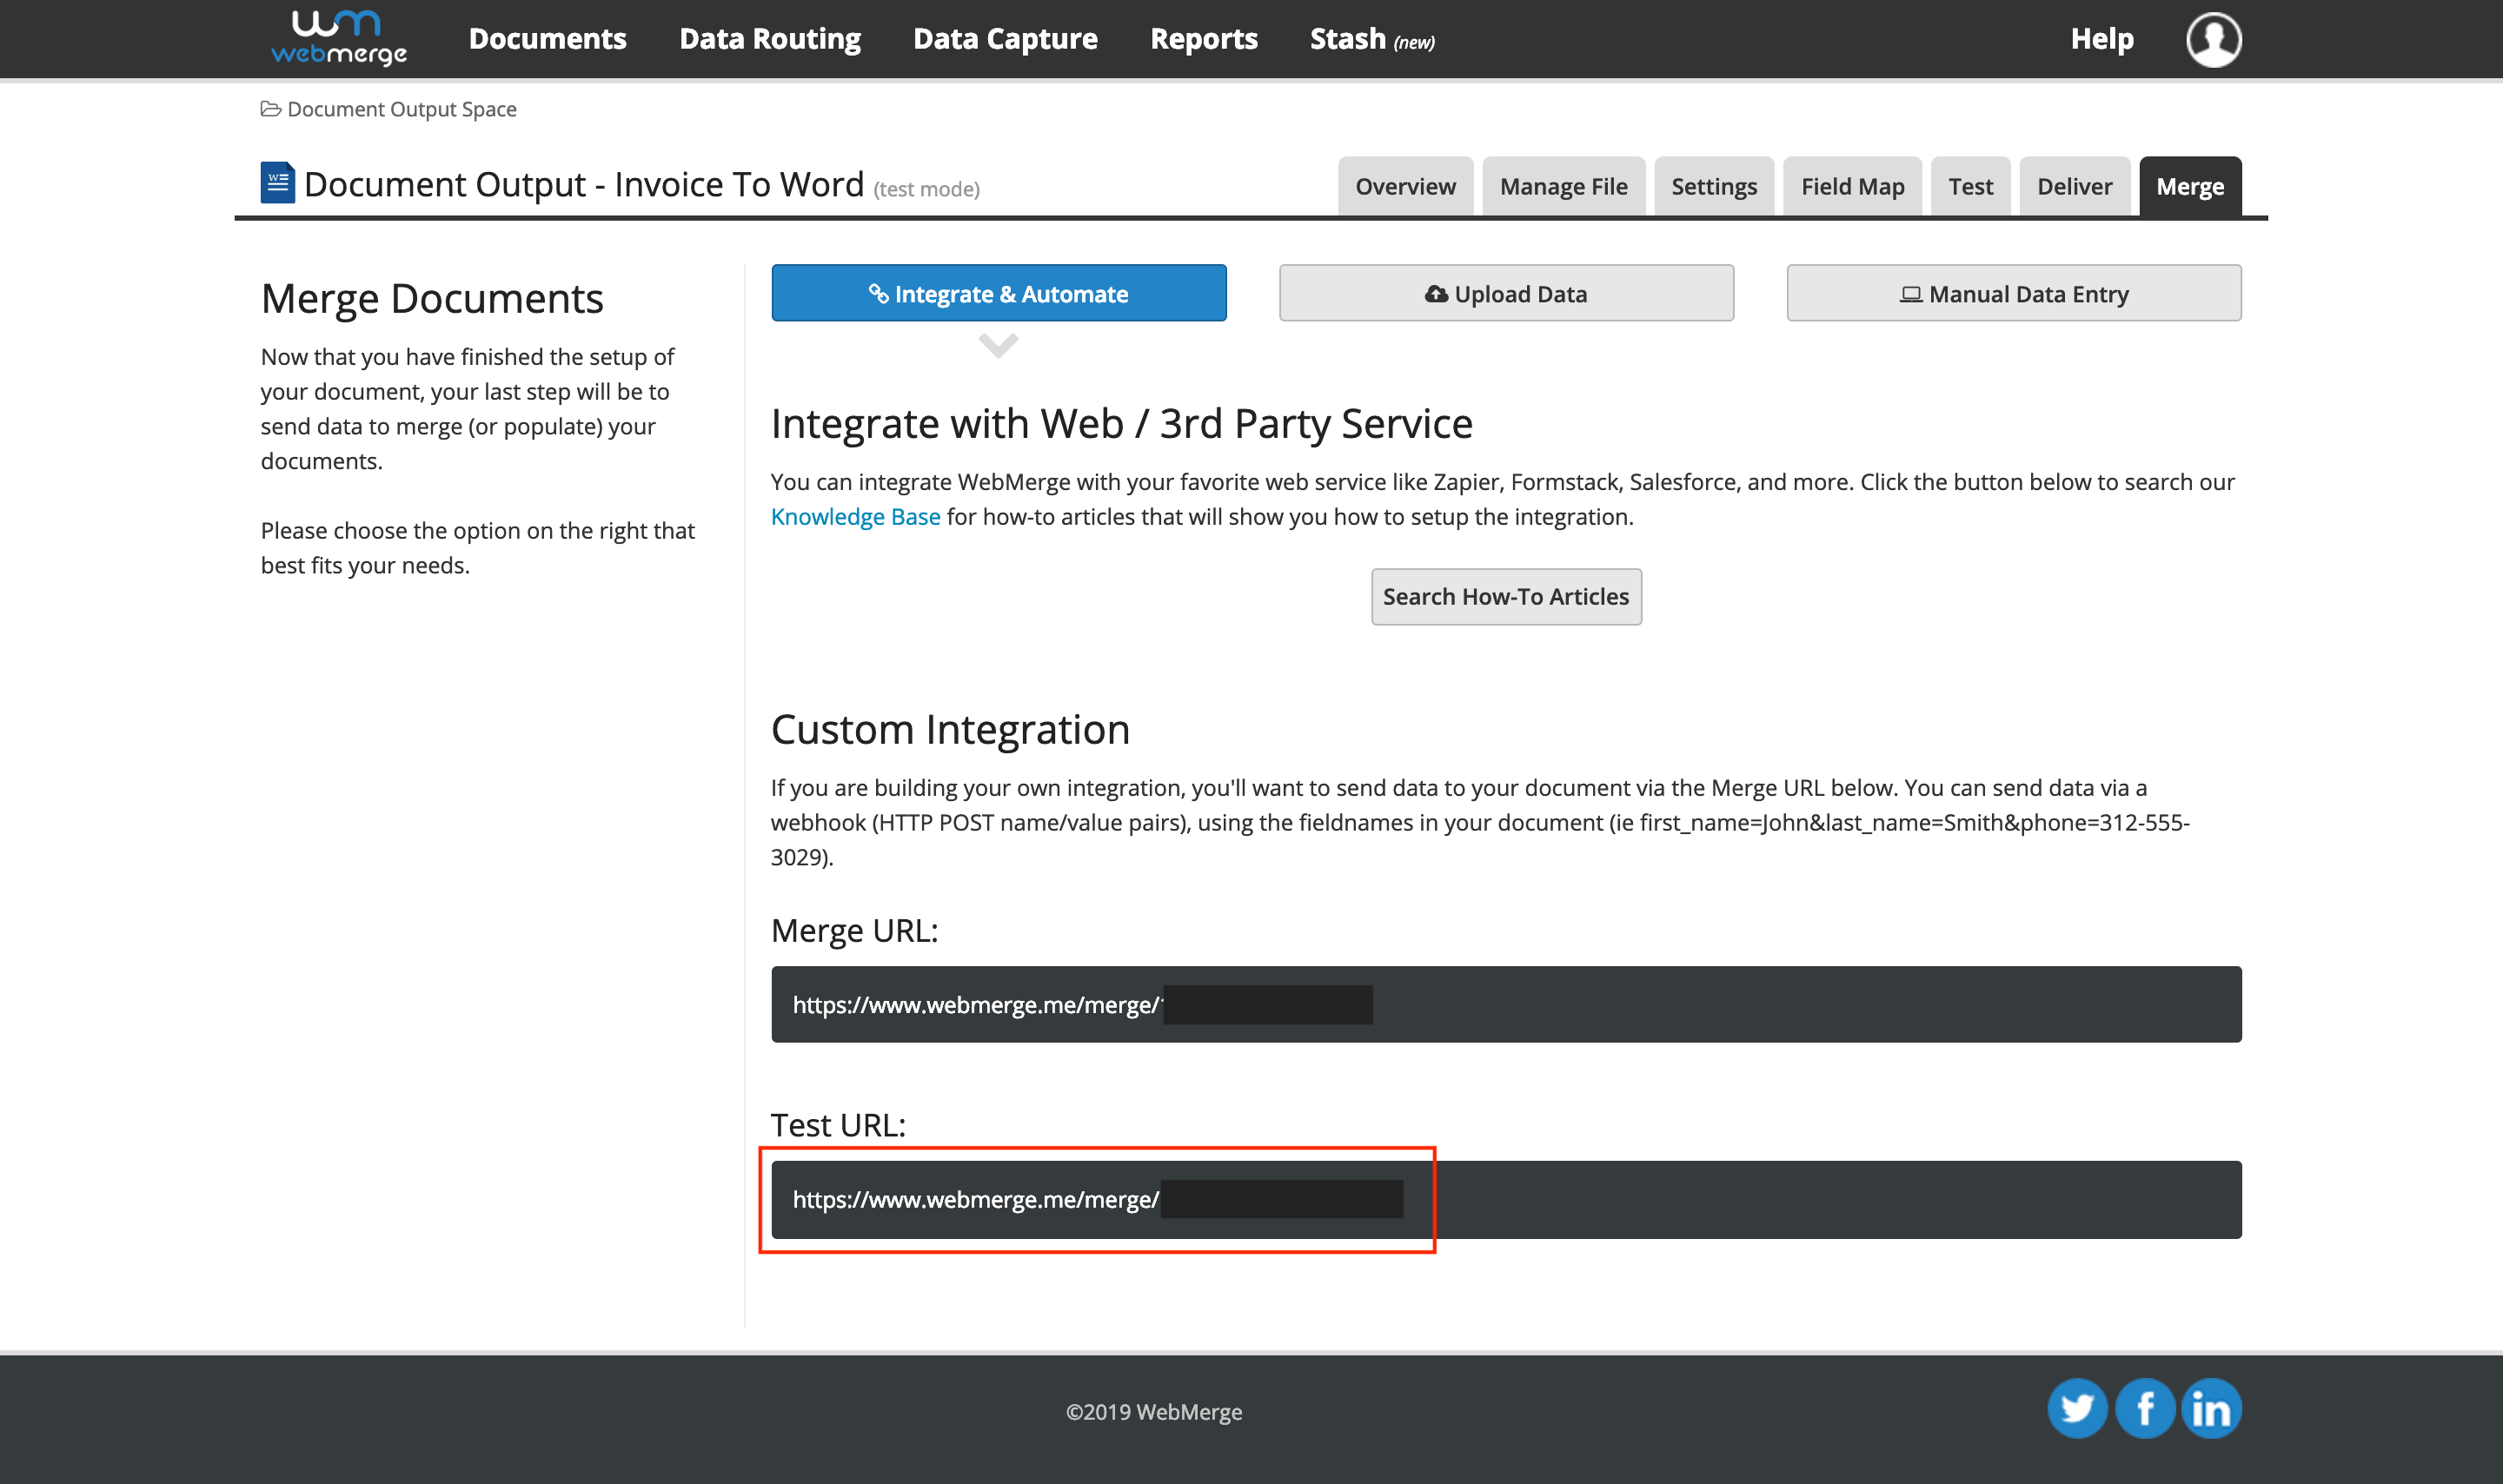
From the Merge tab, copy the Test URL.
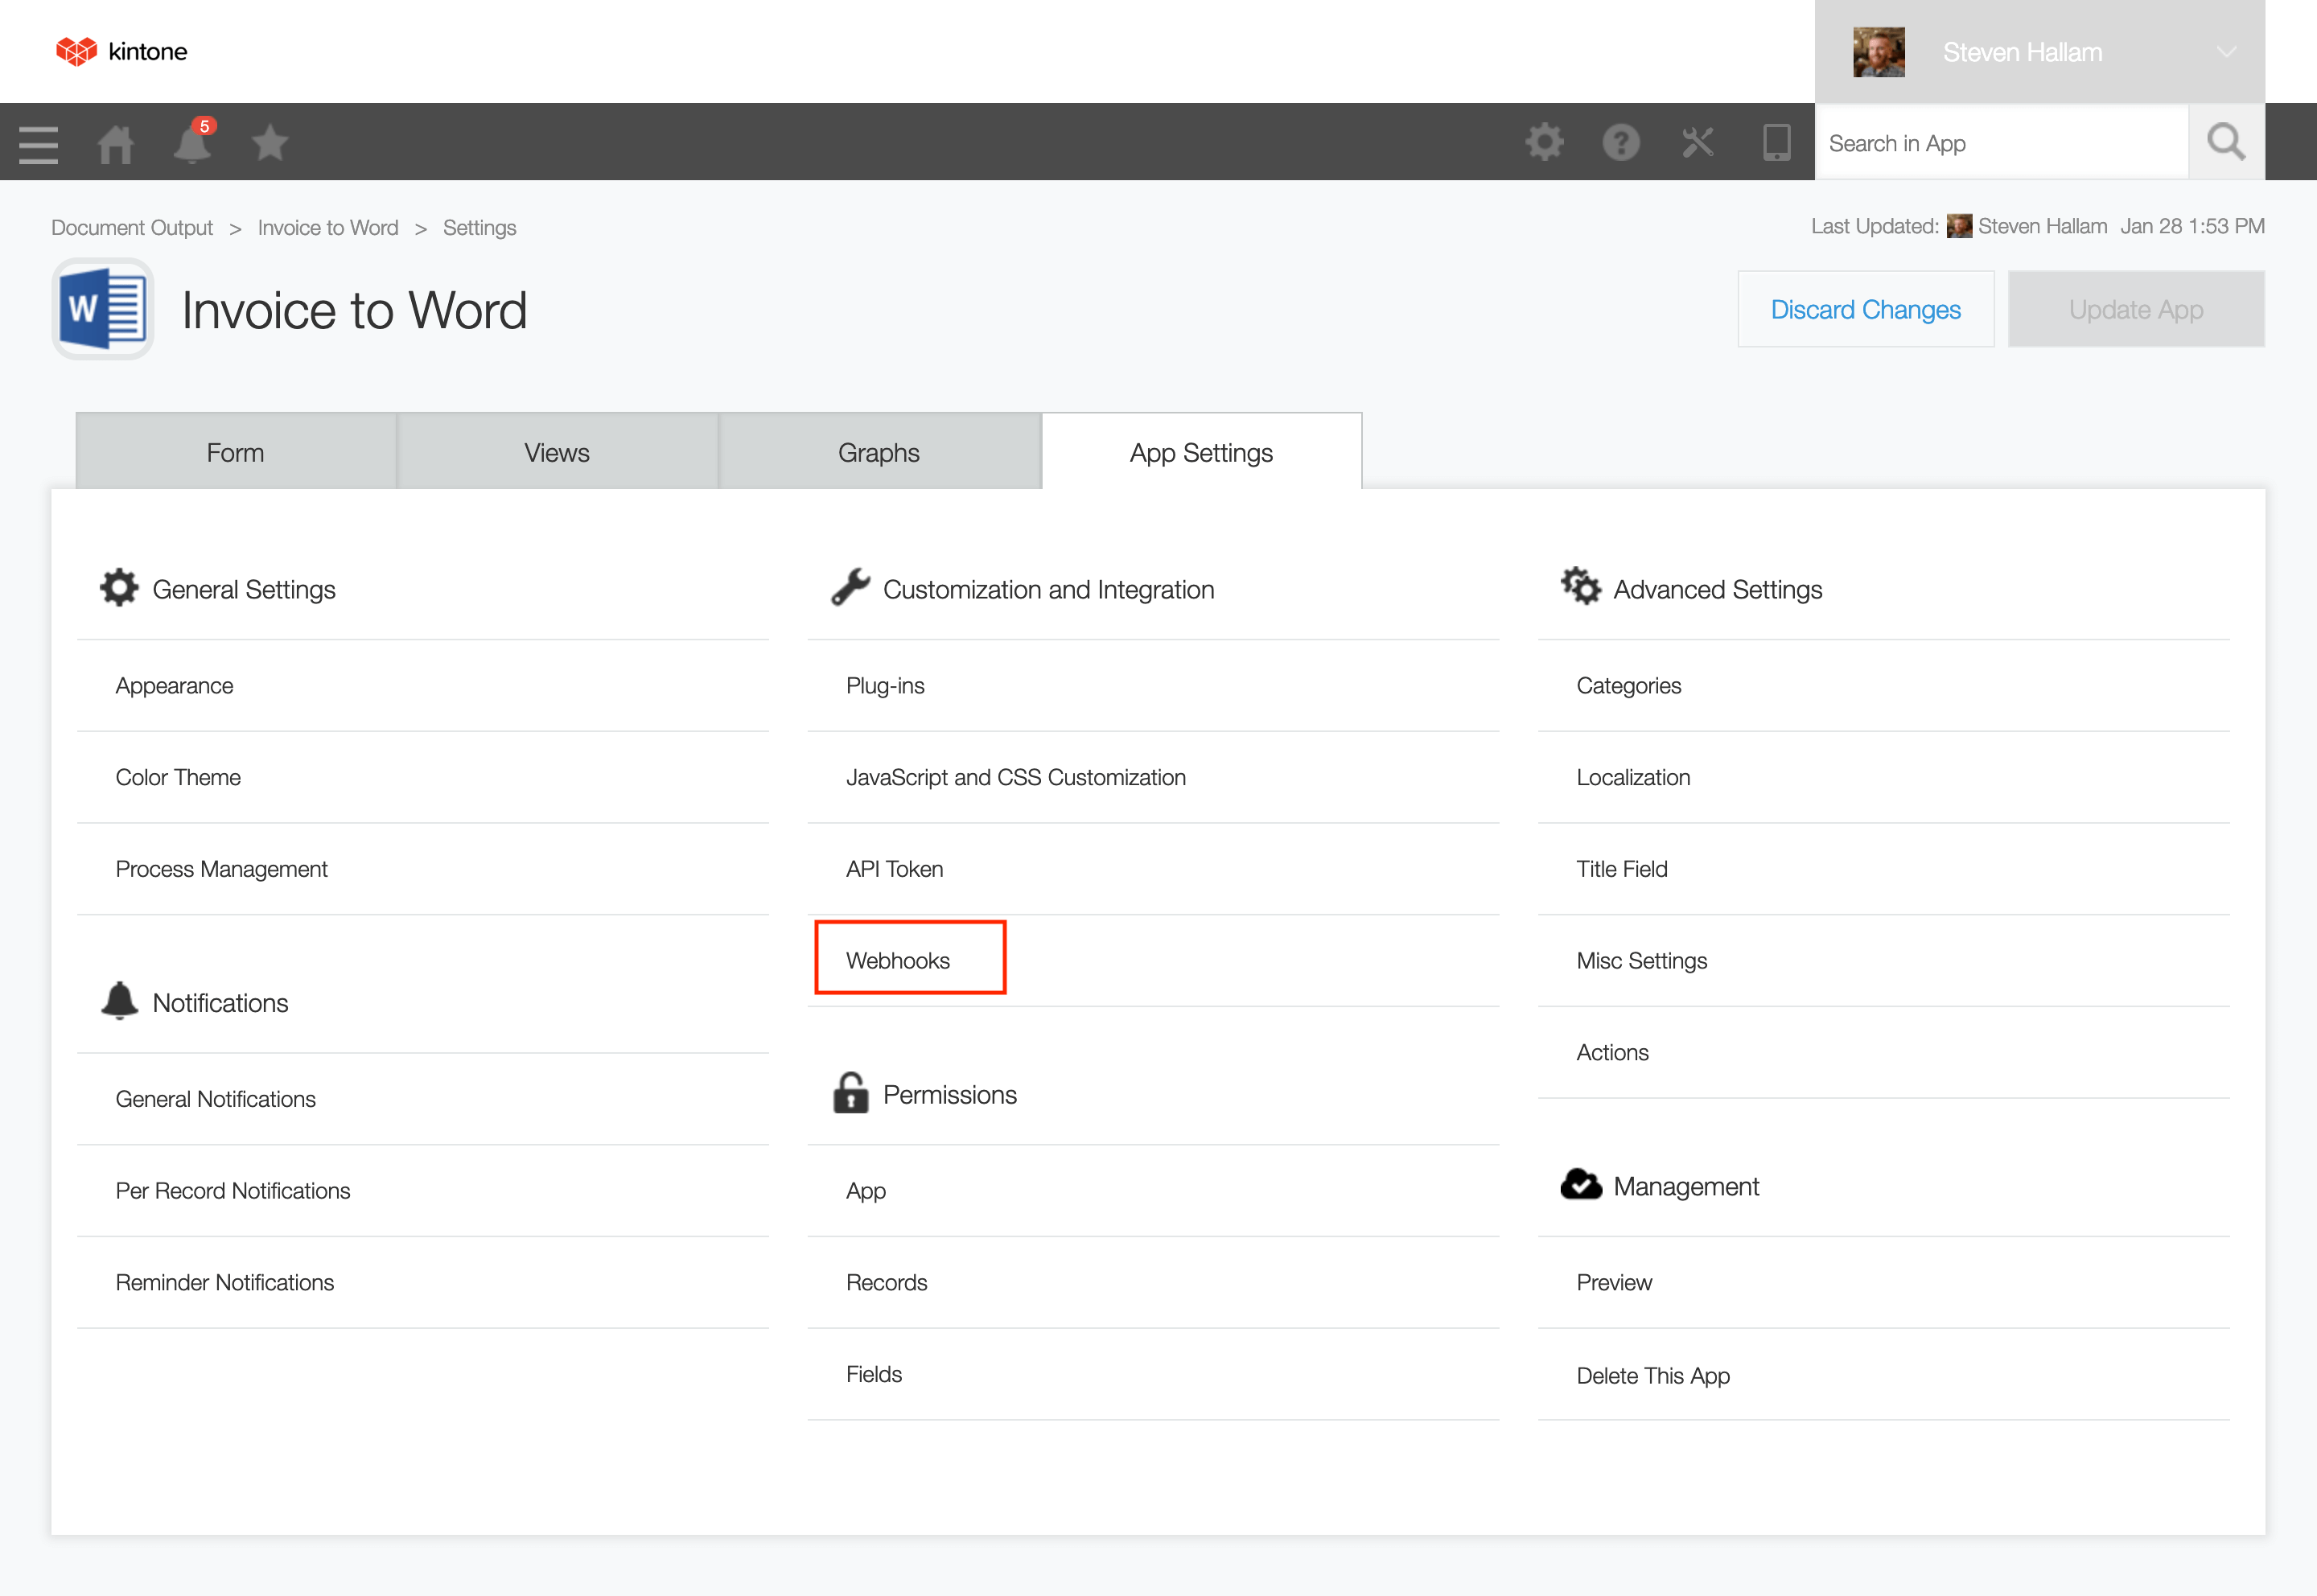
Login to Kintone. Go to the App Settings of the desired app and open the Webhooks settings.
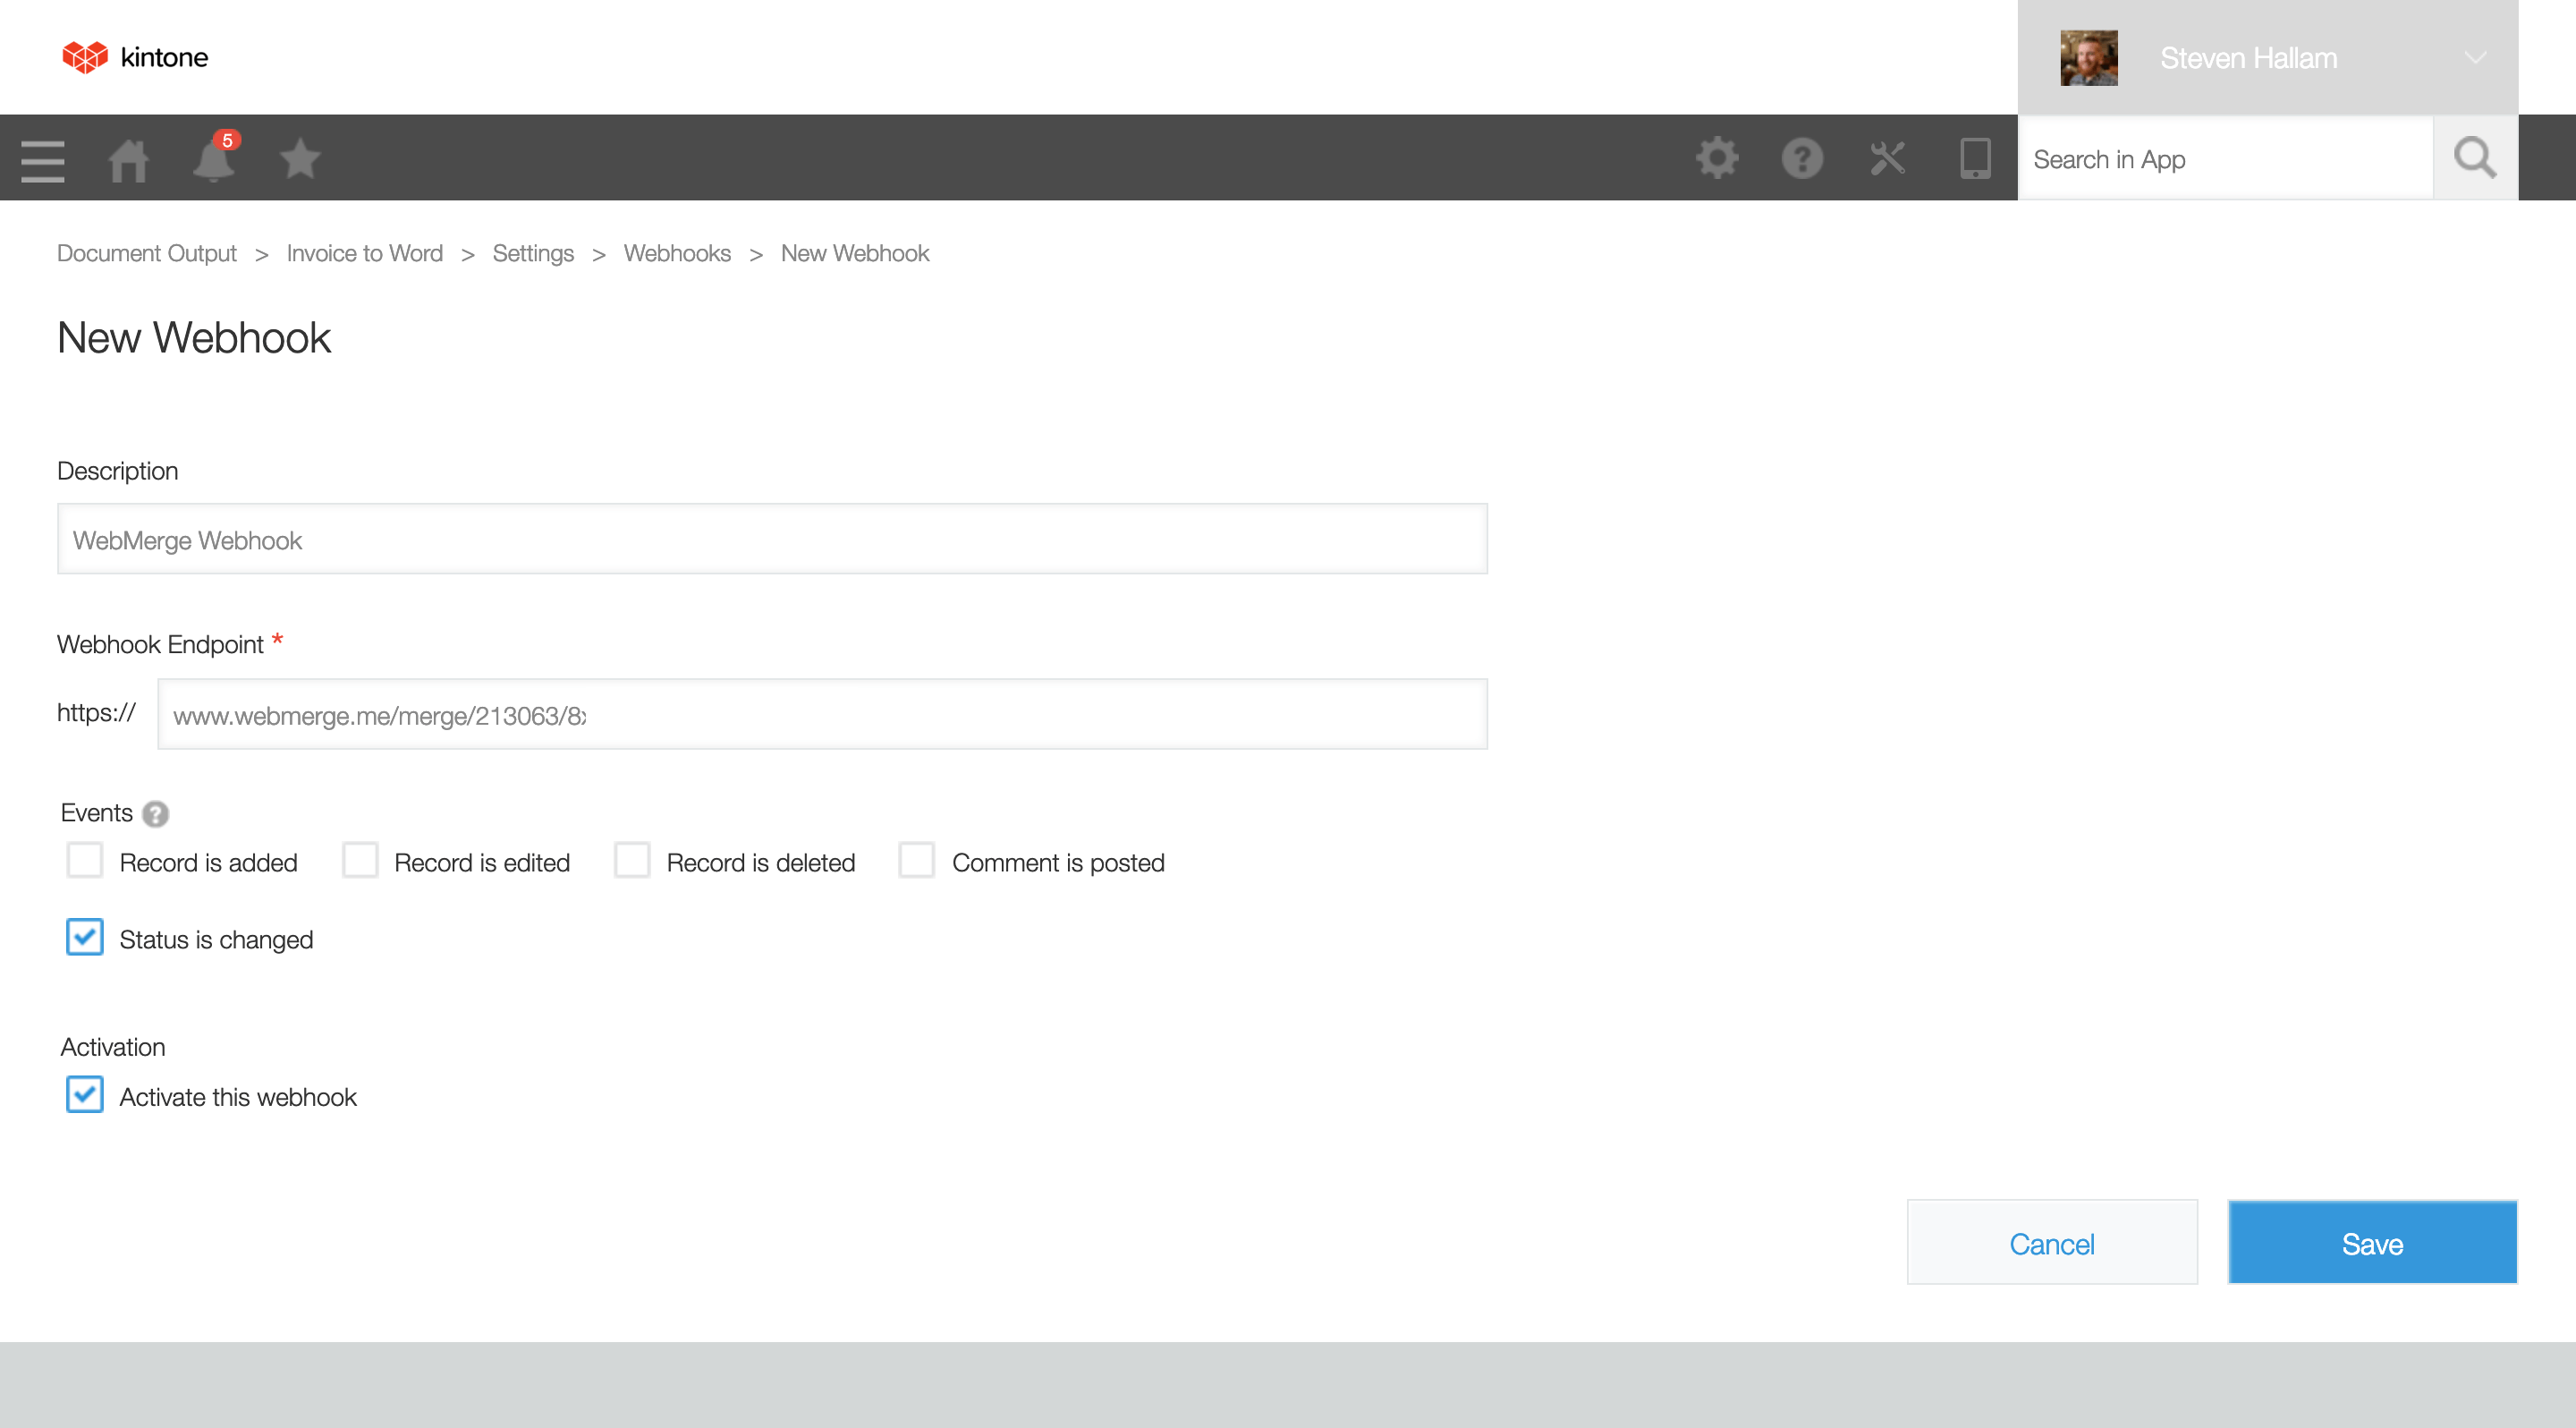
Click on the plus icon and set the name and description of your webhook. Enter the Webhook URL retrieved from Formstack Documents. Define when you want Webhook to trigger (Recommended: Status Change). Then, check the box to activate the webhook and save the settings.
Now that you’re all done with your setup, let’s test the integration. Test out the trigger you setup. In this case, the webhook is triggered when the “Status is changed” so I would create a sample record and change the status of the process management workflow.
*Ensure the document is in Test Mode on Formstack Documents to avoid consuming any merge counts during development.
Once you’ve confirmed the integration is setup correctly, go back to your Formstack Documents account and change the status of your template from “Test Mode” to “Active”.
Navigate
Ready to get started ?