Connect Kintone apps to Domo for advanced charts and data analysis.
Introduction
The Kintone Connector for Domo allows Domo to access your Kintone App data and create charts and graphs on the Domo platform. You can also analyze large quantities of data stored in your Kintone Database in an easier way.
Prerequisite
To use the Kintone Connector for Domo, you will need to prepare the following:
An active Kintone account that contains an App filled with data you want to analyze
Set up
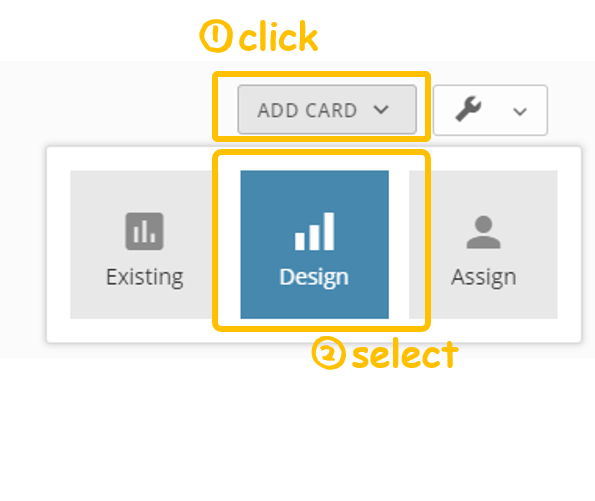
1. Log into Domo and add a new card
Log into your Domo instance.
Add a new card and select Design.
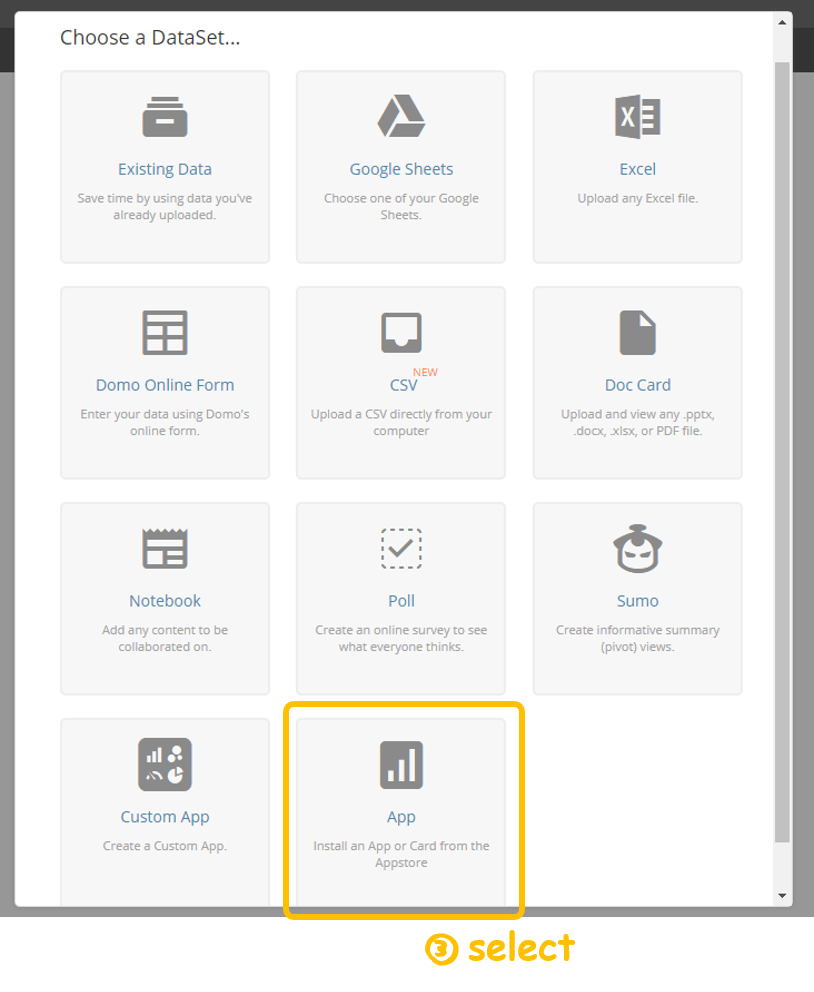
Choose the App DataSet.
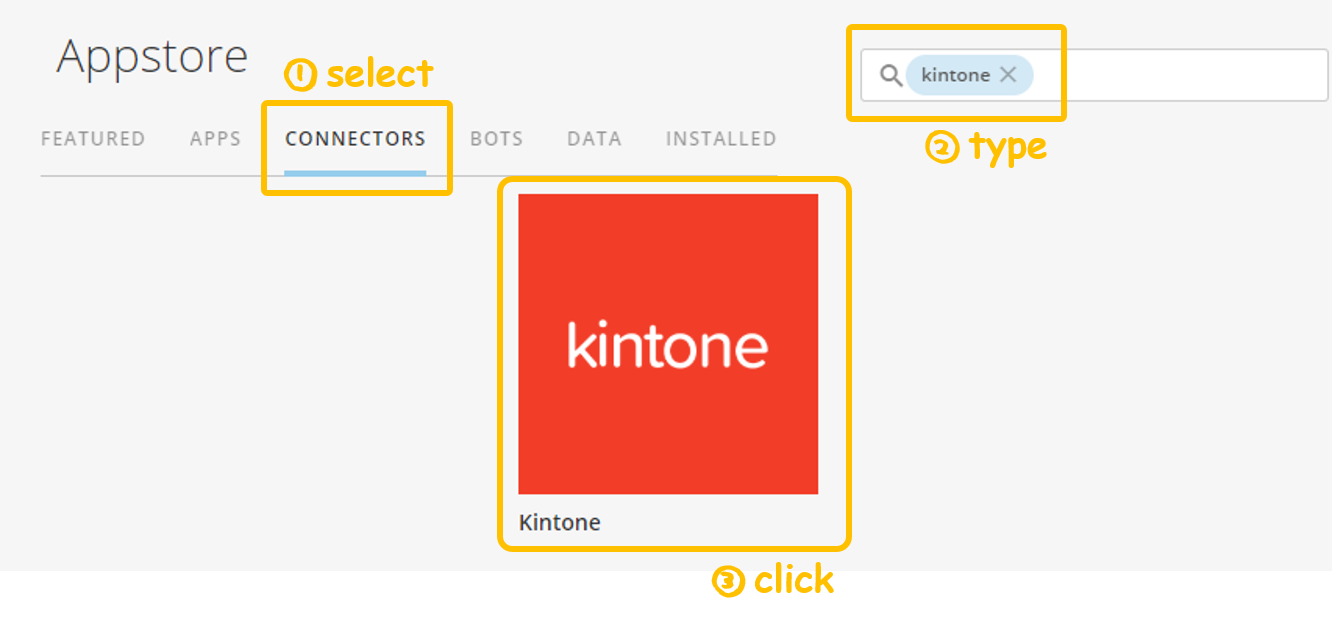
2. Search for the Kintone connector in the Domo Appstore
In the Domo Appstore, select the CONNECTORS tab, and search for “kintone” in the search bar.
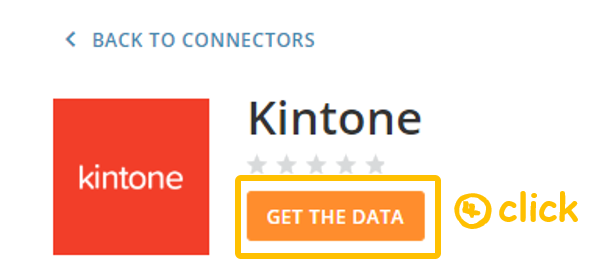
Select the Kintone Connector, and click GET THE DATA.
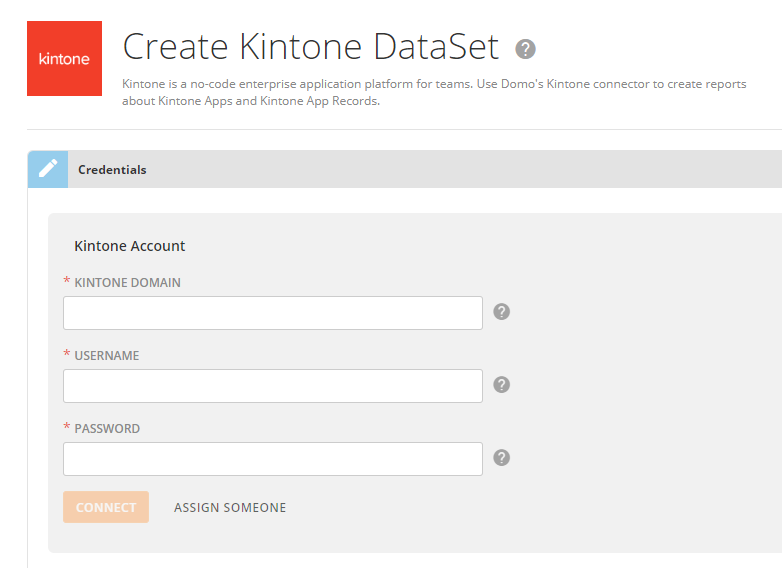
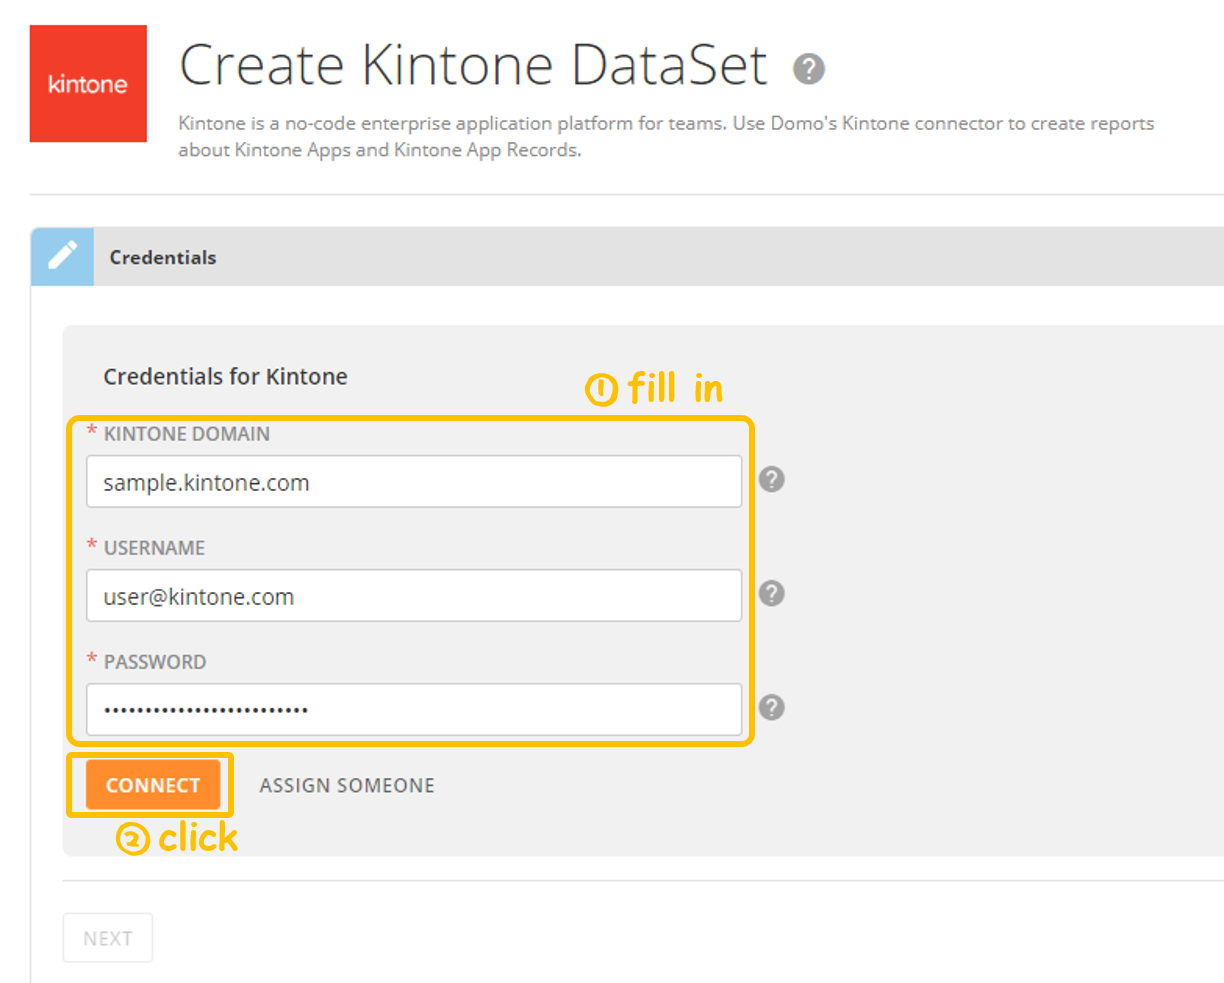
3. Fill in your Kintone credentials
Fill in information related to your Kintone instance.
SettingDescriptionKINTONE DOMAINThis is the domain that you access to log into your Kintone account. If you have a Kintone instance with the URL https://sample.kintone.com then enter “sample.kintone.com” for this field.USERNAMEEnter the login name of a user that can access the Kintone domain. The Kintone Connector will use this account to access your domain.PASSWORDEnter the password for the Kintone account.
Once the credentials have been filled in, click CONNECT to test out the connection.
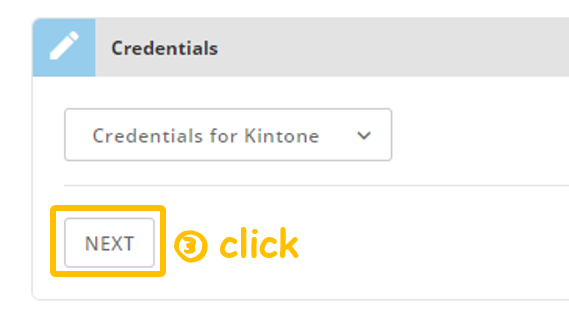
If the authentication succeeds, click NEXT.
If at any time you need to change the credential information stored in the Kintone Connector settings, access the following page: https://<your_Domo_Subdomain>.domo.com/datacenter/accounts
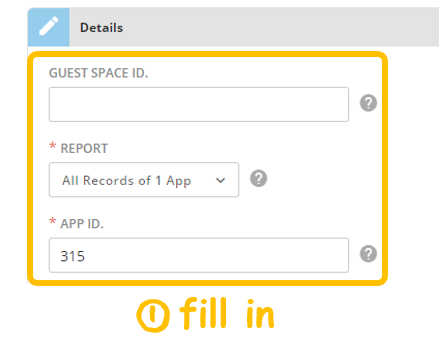
4. Choose the report type and fill in the details of your Kintone App
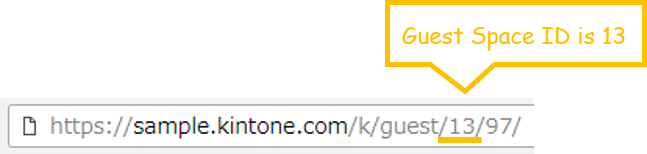
Fill in the details of your Kintone app. Field NameDescriptionGUEST SPACE IDIf your App lies within a Guest Space, enter the Guest Space ID for that app. The Guest Space ID is a number that is included in the URL of the Guest Space. This field can be ignored if you are not using Guest Spaces.REPORTThere are two types of reports that can be created
All Apps This option creates reports based on general information of all Apps within your Kintone domain. This information includes the App name, App description, related Spaces, App creator and App updater. This report does not include any information contained in the records within the Apps.
All Records in a Specified App This option creates reports based on all records that exist within a specified App. The records that will be included in the report are limited to the records that the Authenticated user has permission to view.
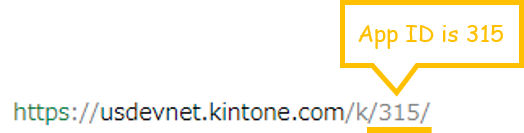
APP IDEnter the App ID of the Kintone App you want to extract data from. You can find the App ID by looking at the URL for that App.
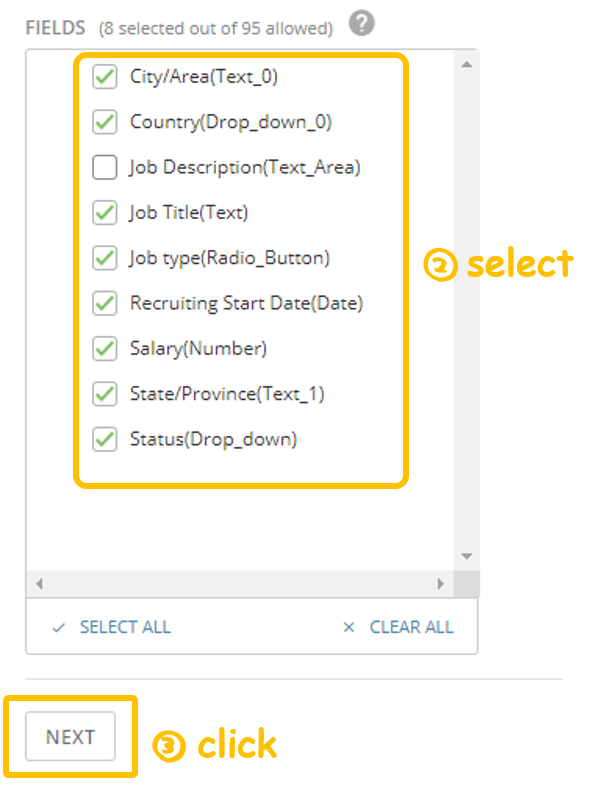
Select the fields in the Kintone App that you want to pull into Domo.
Click NEXT.
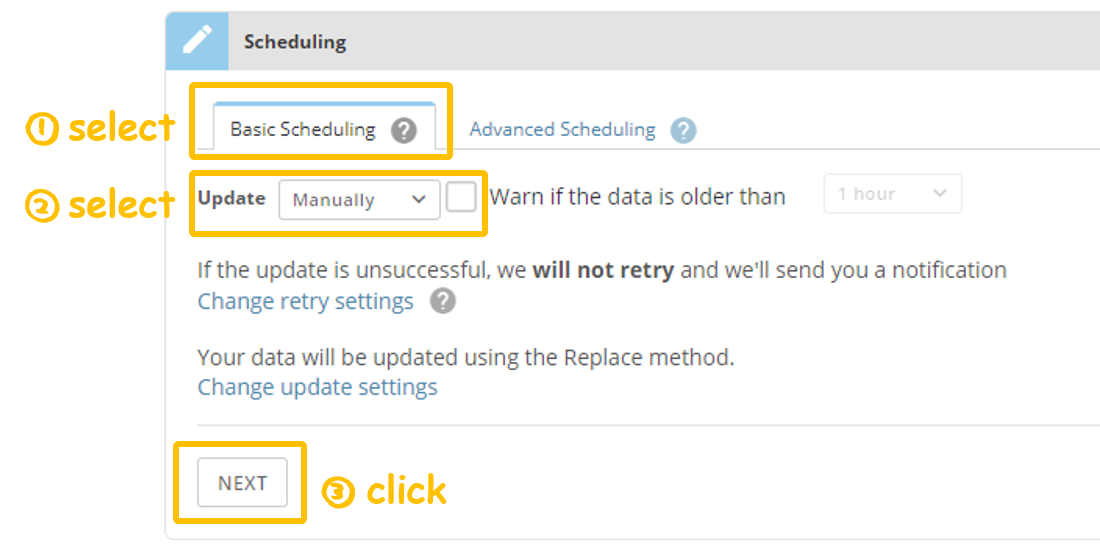
5. Set the Scheduling information
Set how frequently you want Domo to pull in and update data from Kintone.
Click NEXT.
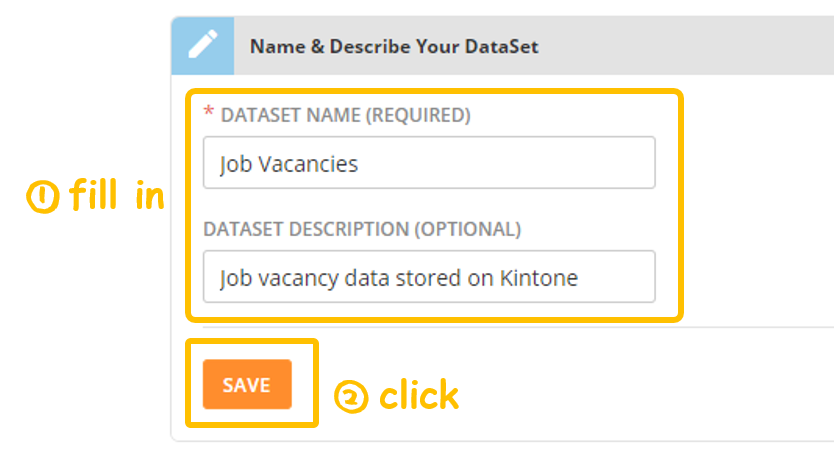
6. Name your DataSet
Set a name and description for the DataSet. This will be displayed in Domo.
Click SAVE.
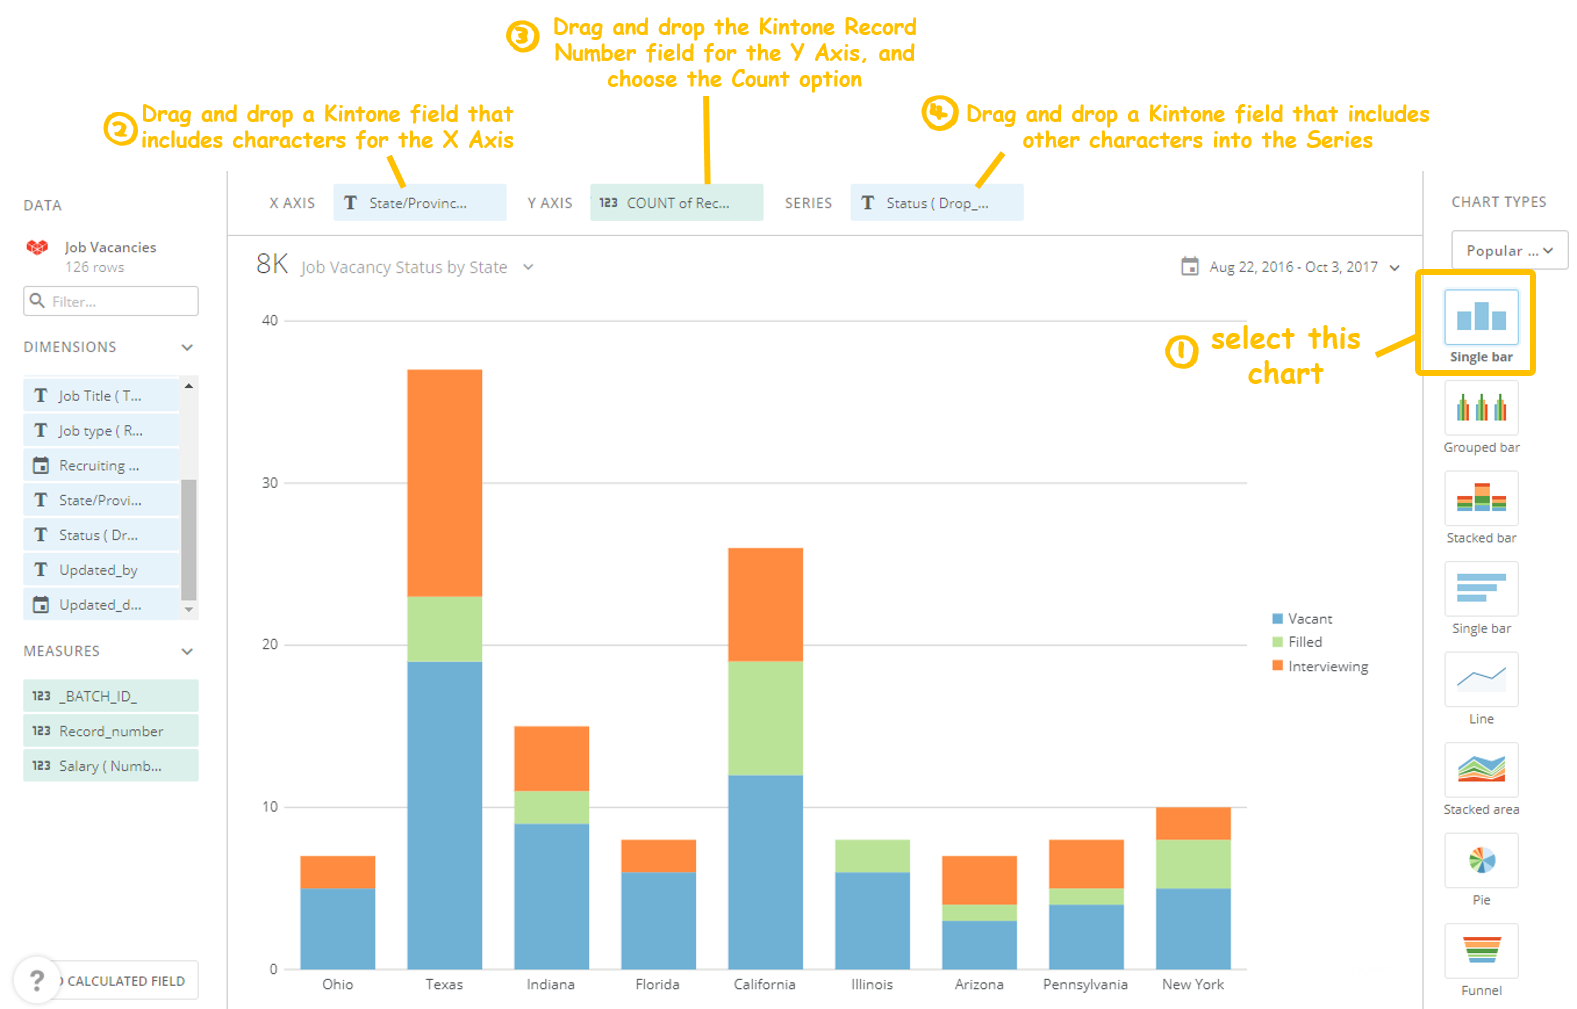
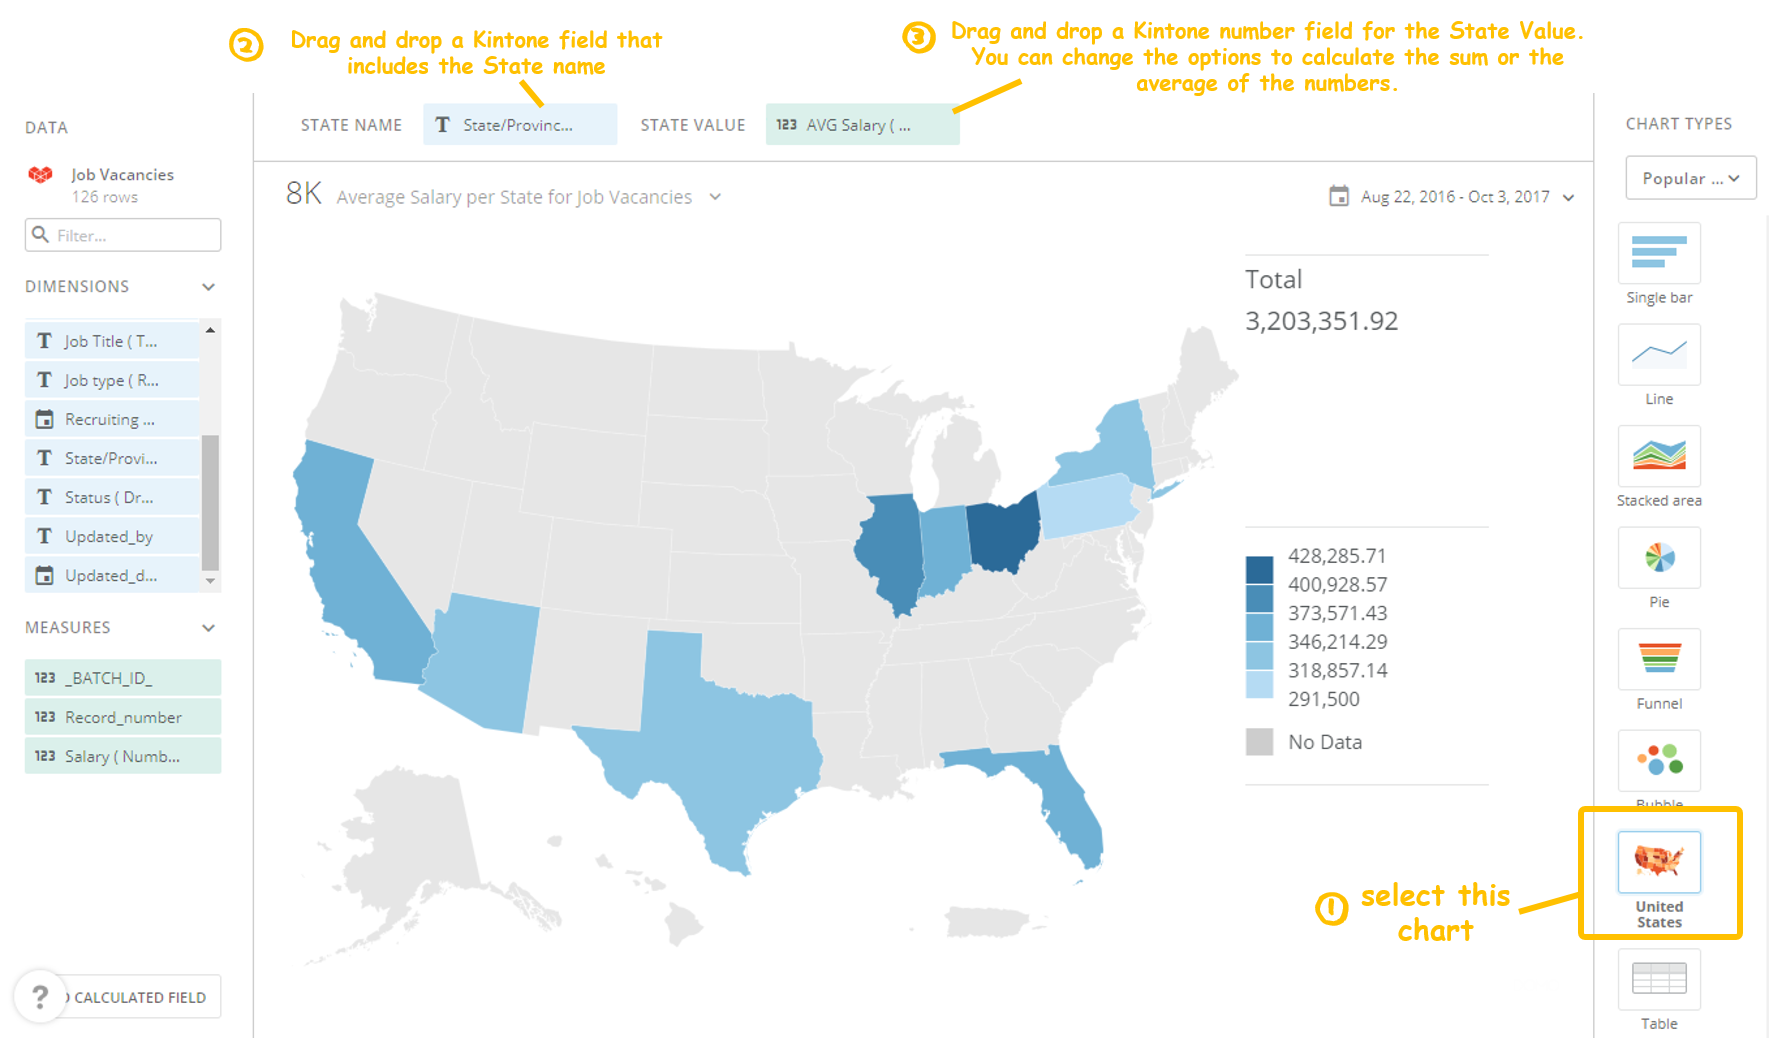
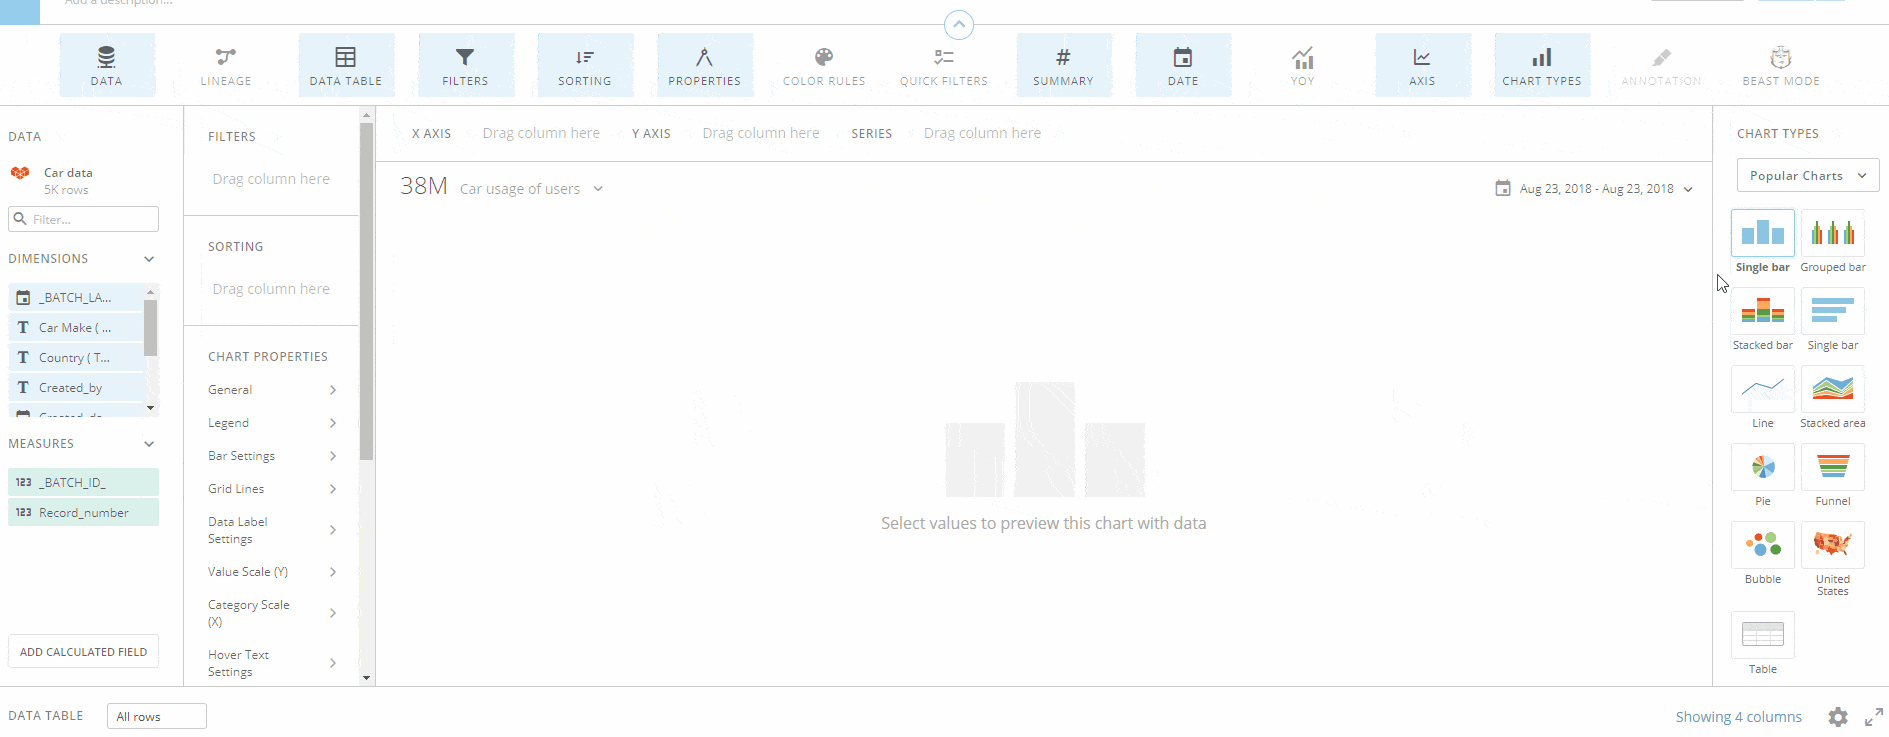
Example Domo Charts
Data collected by the Kintone Connector for Domo can be used to create new charts. Visit the Domo Dojo community to understand the various ways you can create new Domo charts: https://dojo.domo.com/
 Field NameDescriptionGUEST SPACE IDIf your App lies within a Guest Space, enter the Guest Space ID for that app.